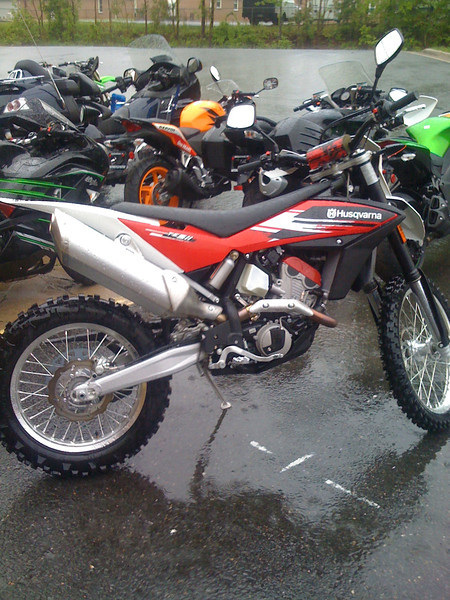
So the adventurization of my TE511 begins. Some say that the bike is just a dirt bike with tags....they may be right but I think it can be more....way more. So as I build it I will post the updates and changes...the good, bad, and the ugly of the build and the shortcomings of the bike if any. So what's my goal.....Minimum 200 mile fuel range, comfortable seat, and able to haul my camping gear and miscellaneous other stuff for up to a short multi week adventure. I am sure I will have more requirements as I really sit down and work through the details but these will do for a start.
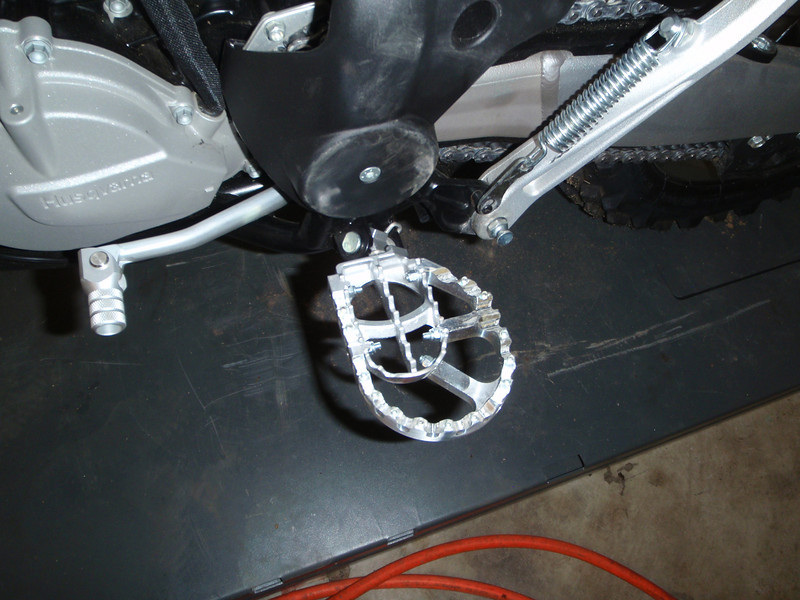
First upgrade is the pegs or should I say peg extensions. Since my foot is still pretty screwed up from last years incident I figured that a large platform on which to stand would be a good investment. So I got a hold of Zip Ty racing and placed an order for their peg extensions, they seem to be a leader in aftermarket parts for the Husky.
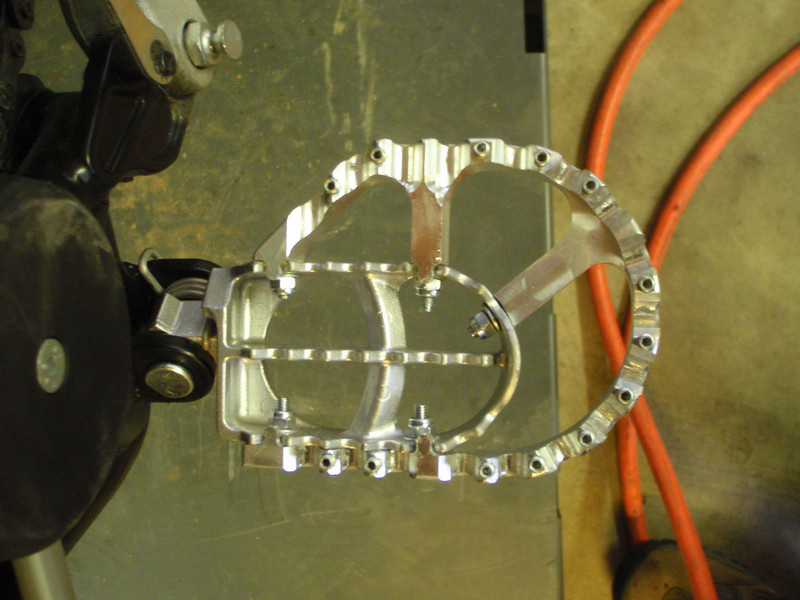
These should make life pretty good!
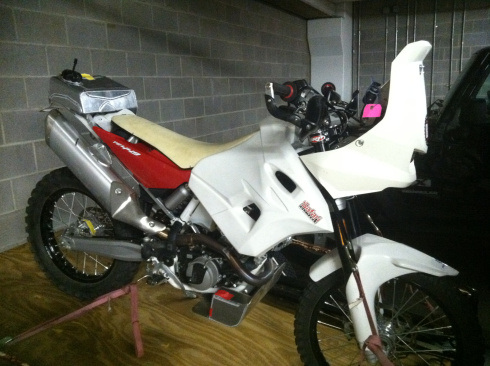
So if you remember back a couple of years ago Bill Conger, an instructor from the BMW off road school, attempted Dakar but it didn't work out so well. In the process of the build of his TE449 he did quite a few things which I thought were pretty good so I took note and waited for the day I got my own TE.
So if you remember back a couple of years ago Bill Conger, an instructor from the BMW off road school, attempted Dakar but it didn't work out so well. In the process of the build of his TE449 he did quite a few things which I thought were pretty good so I took note and waited for the day I got my own TE.
One of the things I worry about is that Husky parts may become difficult to locate or that what little aftermarket there is may dry up so some parts may be purchased first just so that when they dry up I already have them, which is the case with my next part. An adapter for an external oil cooler from Zip Ty racing.
Upgrade #2, the way I figure it cooler oil is happy oil, to a certain point, and more volume is good as well...especially for the long hauls, so I bought the part that I thought may be hard to come by and the more generic parts, i.e., oil cooler and lines, I will pick up a bit latter as time and $$ permit. The bonus is that the kit comes with a reusable filter so if you are out somewhere and flood the bike out, filter replacement won't be an issue, just change the oil and clean filter and carry on. Pretty nice piece!
Upgrade #2, the way I figure it cooler oil is happy oil, to a certain point, and more volume is good as well...especially for the long hauls, so I bought the part that I thought may be hard to come by and the more generic parts, i.e., oil cooler and lines, I will pick up a bit latter as time and $$ permit. The bonus is that the kit comes with a reusable filter so if you are out somewhere and flood the bike out, filter replacement won't be an issue, just change the oil and clean filter and carry on. Pretty nice piece!

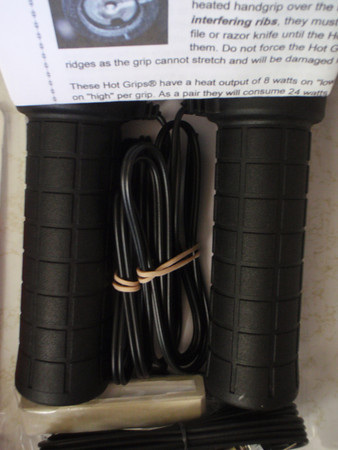
Since this bike on a good day only has about 165 watts of available power of which probably 1/2 or more of that is needed to run the bike. I realized that since I wouldn't be able to run a heated jacket liner, what was next most important thing to keep warm....that would have to be my hands. So I found a guy in the flea market selling a set of heated grips which should make life a bit nicer when the cooler temps roll around....I will install them later this year.
So the latest is to fix the auto retracting side stand. At first I found it entertaining but it quickly became irritating so with a quick spin of the Dremel with a cutoff wheel I removed the nub which makes it auto retract....back to a normal kick stand.
So one of the other things which is not only really irritating but also dangerous as hell is the problem known as "Flameouts". As I understand it it is due to an extremely lean fuel mixture which allows them to get past emissions but it stalls out at inopportune times, like pulling out in traffic.
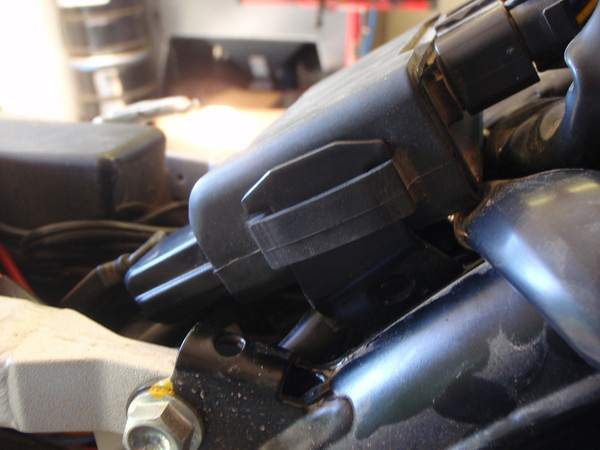
So take off the seat and then you will see the computer which is held on with two rubber insulators, one on each side. Use a suitable tool and free the computer from the isolators.

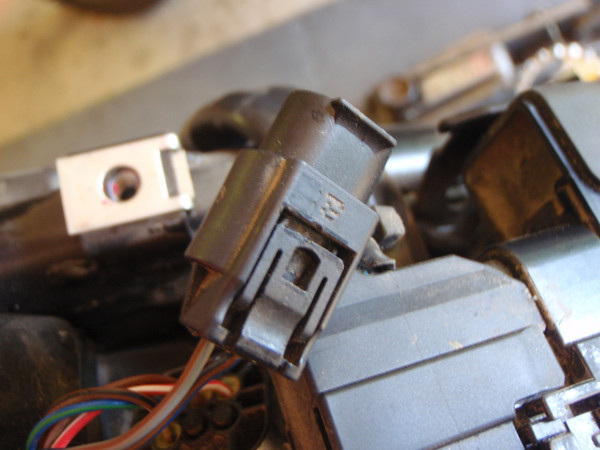
Under the computer you will find two plugs, the smaller one is the one needed for the power up function.
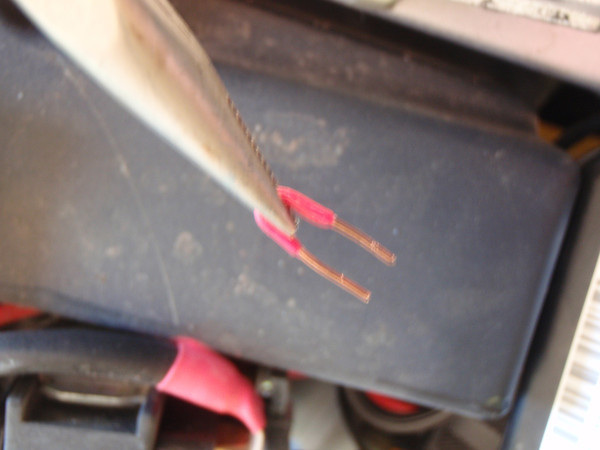
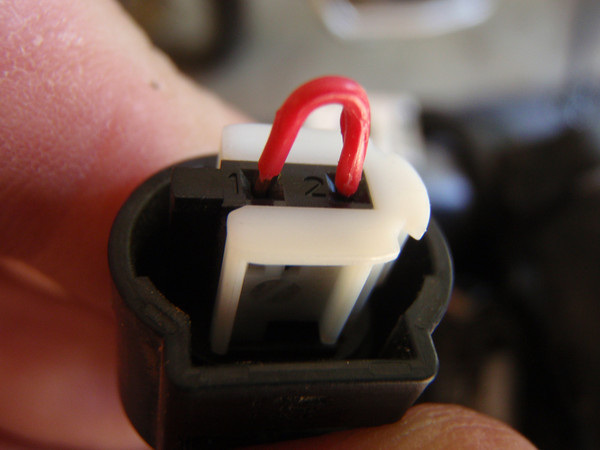
Remove the cap and you will find two open pins, sorry I didn't get the picture without the jumper. I tried first with multi conductor wire but it kept fraying and was too big as well. I had a few pieces of solid conductor phone wire laying around so I made a short jumper and installed it.
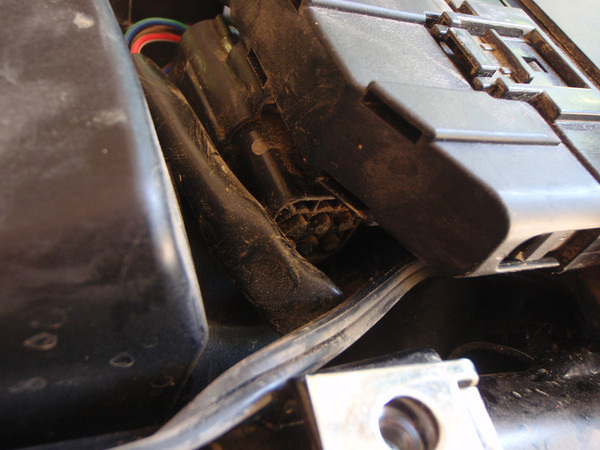
I then reinstalled the original cap and put the connectors back where I found them and reinstalled the computer back from where it came.
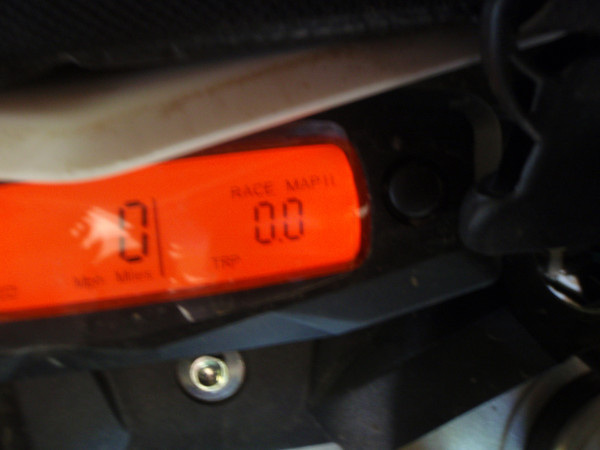
This it what it looks like now on the odometer, it's hard to read but the screen says "Race map II" after installing the jumper. This should richen up the mixture a bit and stop the "flameouts"....hopefully. I haven't had a chance to ride it yet.