Windshield
There are few mods which I guess I clumped together for no other reason they don't belong to anywhere else. The first was the windscreen. It's fine for deflecting the air over me, but I am pretty short. I lucked out and got a steel of deal on the windshield, but expect to pay around $400 is you need to buy the parts direct from the BMW.
BMW P/N is 46 63 7 697 209, WINDSHIELD SPORT, CLEAR - L=280MM
BMW P/N 71 60 7 705 971, SET: SET OF PARTS F WINDSHIELD
BMW P/N is 46 63 7 697 209, WINDSHIELD SPORT, CLEAR - L=280MM
BMW P/N 71 60 7 705 971, SET: SET OF PARTS F WINDSHIELD
Oil Filters
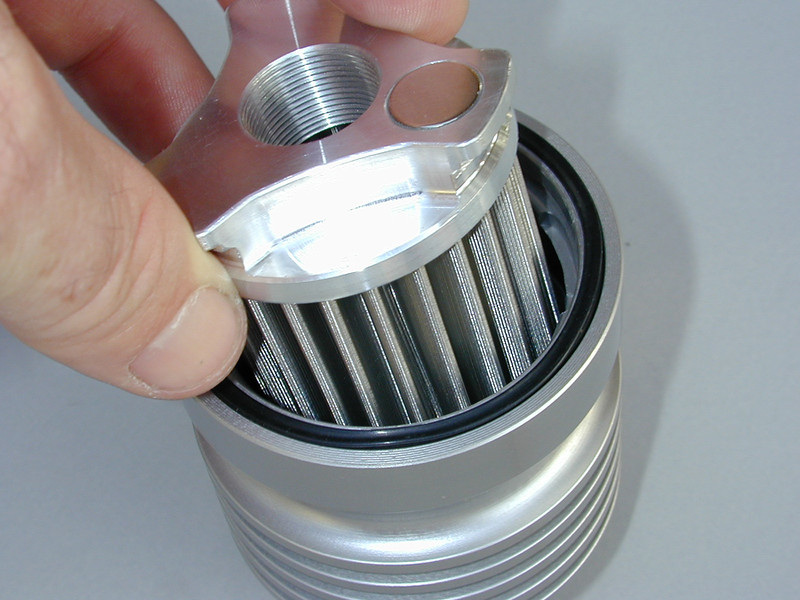
Since there was high probability that I will be fording water crossings, I decided to put in a reusable oil filter. Also, given the number of miles that I will put on the bike, this is one mod that should pay for itself. I chose Scott's Performance since they filter down to 35 microns (which is about 3 times better than most good paper filters). The part number is 2151. About $70.
Paint Protection
No doubt the XC will see her fair share of dirt and grim. While it's a badge of honor, the result of my lack of baths will eventually have a toll on her. As plastic body panels become harder to source the more rare and old, it's best to have a pound of prevention. I decided to put 3M Nano Film on the painted bits. While this kit doesn't have complete coverage, it does appear to cover the major high traffic bits.
I ordered P/N 601 from Prints and Plots. Clean the panels from all grit, grim and dirt.When you apply it, use a spray bottle with a few tables spoons of regular dishwashing soap. Then liberally spray both the back of the sticker and the panels with the soapy water. Move the sticker around as needed, then use a heat gun (hair dryer) to softly heat as you work the bubbles out with a straight edge. Do NOT over heat. Expect about $100 for this project.
I ordered P/N 601 from Prints and Plots. Clean the panels from all grit, grim and dirt.When you apply it, use a spray bottle with a few tables spoons of regular dishwashing soap. Then liberally spray both the back of the sticker and the panels with the soapy water. Move the sticker around as needed, then use a heat gun (hair dryer) to softly heat as you work the bubbles out with a straight edge. Do NOT over heat. Expect about $100 for this project.
 |  |
Radiator Guards
It wasn't long after just road riding that the radiator exposure was obvious. It was scary how little abuse I had doled out to her, and how painfully obvious this was a weak point.
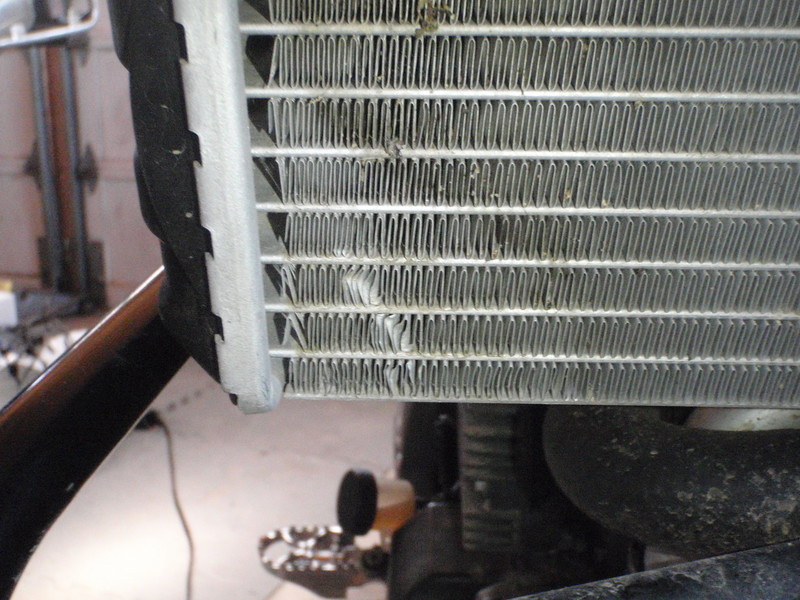
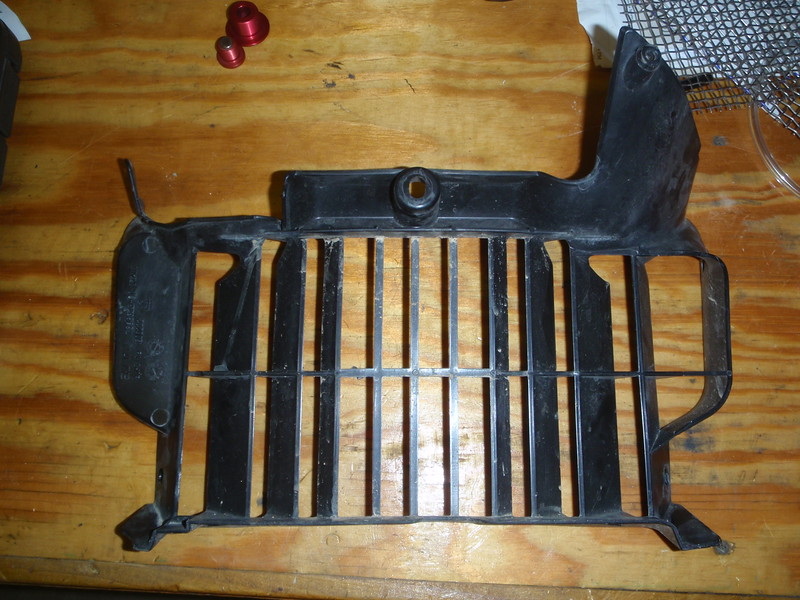
There were very few aftermarket sources for a radiator guard in the 2007-2009, and none that I found in 2014. It is a good thing that the plastic radiator guard lends itself nicely to modification. The first step is to unbolt it from the bike.
 |
|
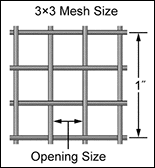
Next, simply cut the mesh to shape of the plastic guard above. While attaching to the inside would give a 'cleaner' look, it is also less functional. Since you are attmepting to deflect rocks, a mesh that is touching the radiator wont' have as much "give". So, I attached it to the outside. I used some plastic shealthing left over from wiring to cover the edges. Then, used about 20 zipties. Here's the end result: