BlastOff Adventures
  • About
  • Ride Reports
    • North America >
      • Canada >
        • Trans Taiga
        • Trans Labrador Highway
        • Newfoundland
      • United States >
        • XXX Attack (And the Grety GSA Goose) on the North East BDR
        • Ready, Set, TAT (Trans America Trail)
        • Corner carving in West Virginia
        • Key West, FL
        • Continental Divide
        • Old Line State (Maryland)
        • Second Sunday Sled Rides (SSSR)
    • South America >
      • Patagonian Coddiwomple 2019
      • Ecuador--Calibrating to Zero
      • Ecuador
    • Events >
      • 2019 California Superbike School
      • 2019 Roaming Rally
      • 2016 CLASS Motorcycle School At VIR
      • 2015 Roaming Rally
      • 2016 Pine Barrens 500
      • 2016 SRT Performance Driving Experience at Bondurant Racing School 2016
      • 2014 Void
      • 2014 Altrider's Conserve the Ride
      • 2014 Fundy Adventure Rally
      • 2014 GS Trophy Challenge
      • 2014 Roaming Rally
  • Bike Builds
    • BMW F700GS Dorito Roulette
    • BMW X-Country Dorito Cool Ranch
    • BMW HP2 Enduro
    • Husqvarna TE 511
    • KTM 625 SXC
    • Yamaha MT-09 Dorrito Jurassic (AKA T-rex)
    • Yamaha WR250R
  • Contact

For the want of a nail, the shoe was lost....

6/12/2019

1 Comment

 
Picture
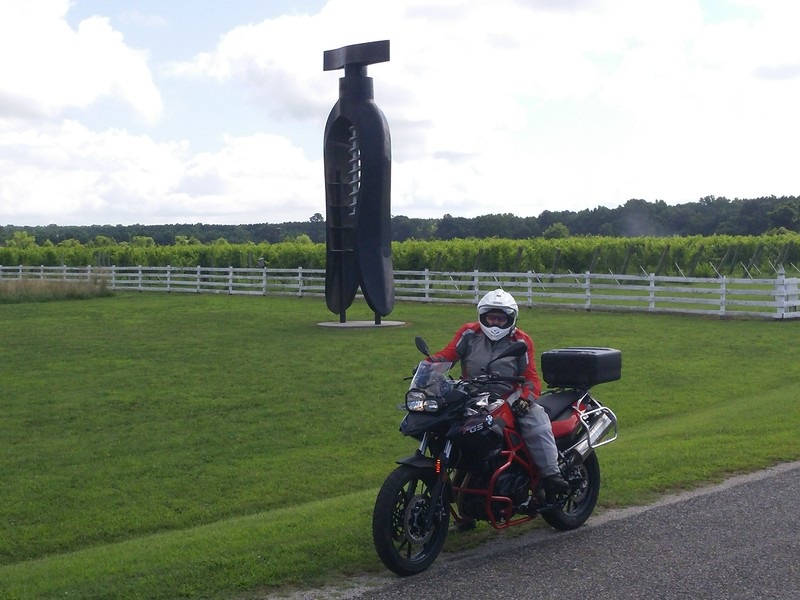
Perhaps the bane of the mighty F700 is the completely unsupported availability of nice suspension (e.g. 'spench) owning that to BMWs use of the Marzocchi 41mm diameter front forks.  But now after 9 years on the F650/F700 platform and 137K miles for me, my nirvana is coming to fruition.    Clearly, the Ohlins/Traxxion/Hyperpro/etc companies had little appetite to eat the sunk costs to only support the lonley F700.  So years marched by.

One the previous twin bike, I had done the Racetech Emulators and heavier springs.  While it did fix some aspects of the front end diving, it certainly came with a bag of headaches too.  For one, it had a propensity to ride much like an unloaded dumptruck over square-type compressions.  So, when I got this second twin bike in 2015, I had no decent front end options but yet the rear 'spench sported an Ohlins upgrade.

My top candidate was Emig Racing had proposed a rather elaborate plan to graft DR forks, machining a new top clamp, new axle and on and on.  The plan was both crazy (!) expensive and I wasn't confident that it would put me where I wanted to be.  And so the years marched by. 

Now the savior to this story comes from two unlikely heroes.  The first was the Kawasaki 300.  Yes, a little 300cc Asian bike that happens to be a fan favorite on the race track.  As the boys (and girls) race the dog snot out them, a sustainable user base is born.  You see the Kawa 300 apparently shares our whacky Marzocchi 41mm front forks.
Picture
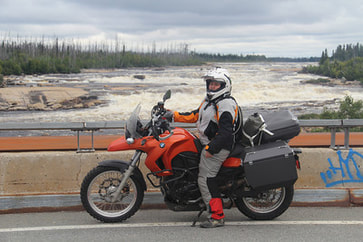
Then on a random day in May 2019, I attended a training day with California Super Bike School.  It was probably one of the most dynamic schools I had the pleasure to attend.  However, it brought back to the front of my mind how woefully inadequate the F700 front end is.  I left the California Super Bike School longing for a ride that came out the corners better.  I actually went bike shopping considering both the MT-09 and the Ninjette400s.  After a long hard deliberation and trade space anaysis the F700 did complete nearly everything I wanted in a bike....except that dastardly front end dive.  My second hero to this story is my personal 'spench magician, FastBike Industries.

The proprietor of Fastbike, David, has done me well over the years.  He's built nearly a half dozen builds for us, and is always willing to listen.  He departs the conversation with  a promise to do some research.  Not 48 hrs later, he has a tasty option that I cannot refuse.  Now a month later, my F700 forks are in his shop getting upgraded.
Picture
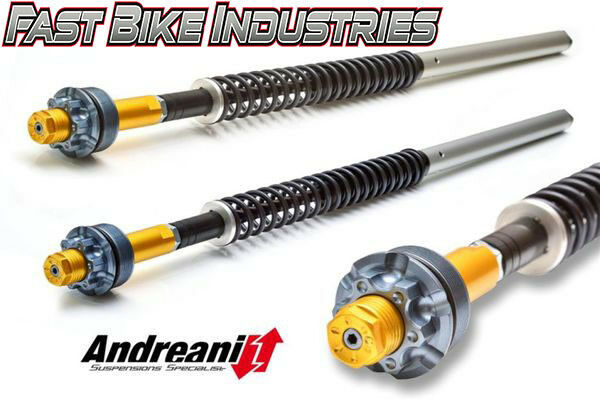
I suppose I should blame the Italians (Marzchocci) for getting me into the 41mm mess.  But then, I can also congratulate the Italians for righting-a-wrong. Andreani group quietly went to production, though I had not been tracking this since the trail went cold in 2015.  Let me introduce you to the Misano Cartridge
"MISANO" FORK CARTRIDGE KIT
The complete cartridge with hydraulic adjustment and spring preload for original fork (OEM), developed by the Andreani Group, is equipped with a sophisticated hydraulic system that ensures the adjustment in compression, extension and preload of the spring, with adjustments placed directly on the upper cap of the cartridge in order to guarantee easy access to the set-up.

A made in Italy cartridge
Andreani Group has developed the famous Misano cartridge, appreciated all over the world for its exceptional quality-price ratio. Inside it is formed by a 20mm piston which guarantees a better functioning of the hydraulics. Mounting this kit by Andreani, the improvement at the front end can be seen from the very first laps. Braking is more stable and modular and even the precision and stability in the corners are significantly improved.
Comfort and safety are the key words.  Andreani offers the possibility to choose the springs for the Misano cartridge according to the rider's weight and according to the use or the driving style, to have maximum personalization. This guarantees an excellent feeling with the front and the comfort appears decidedly superior.
Having a firm front and more stable at the entrance and during cornering, it also increases the driving safety and it is possible to have much more precise trajectories, making more use of the grip between the asphalt and the front tire, obtaining a safe, stable and fast motion .
Ohlins oil for fork cartridges is required for assembly

FEATURES
  • 20mm diameter pistons with increased oil passages
  • Adjustable in compression, extension and spring preload
  • Improves stability, control and driving precision
  • Possibility to choose the calibration of the springs based on the weight and style of the rider
  • Settings and adjustments positioned on the upper cap of the cartridge
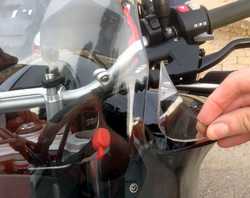
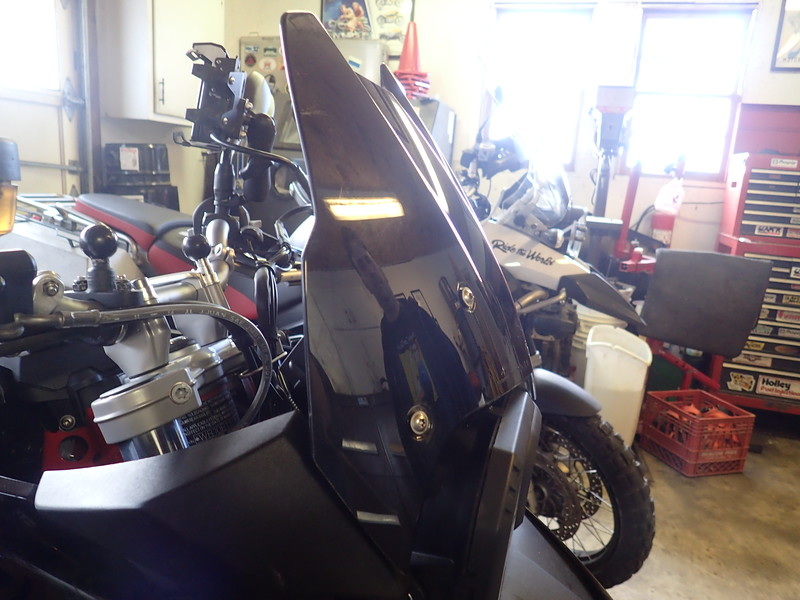
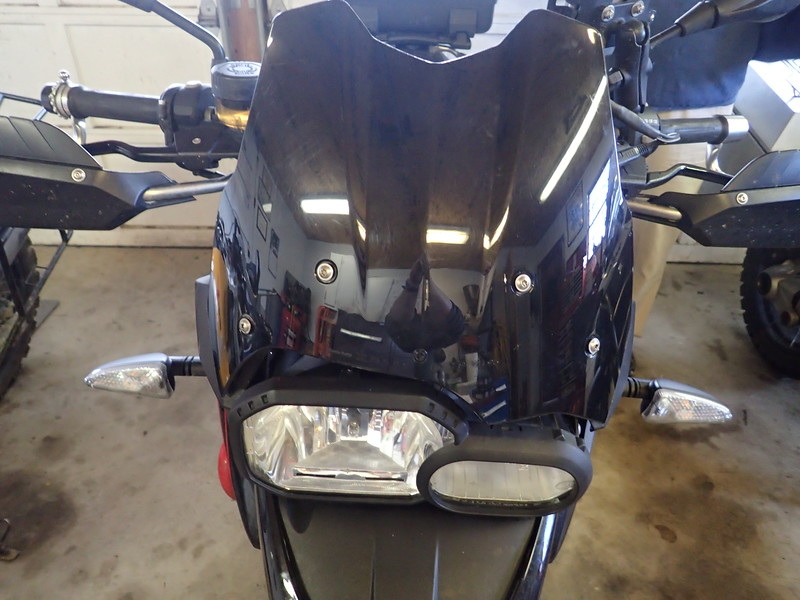
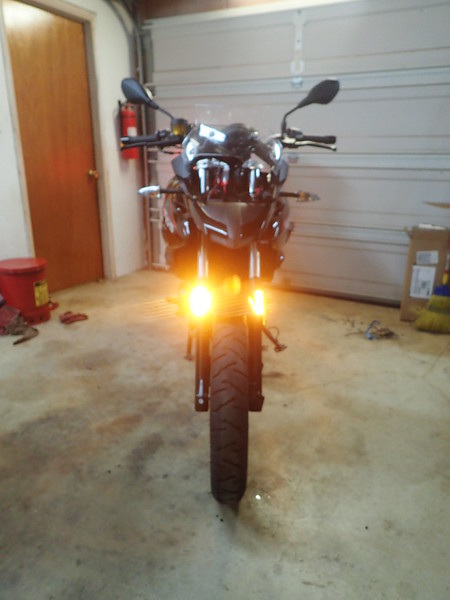
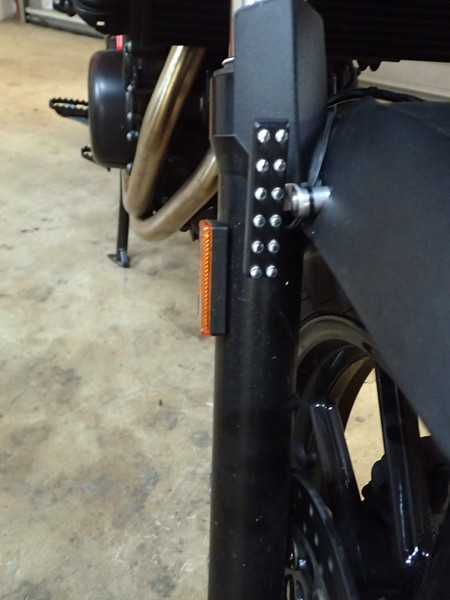
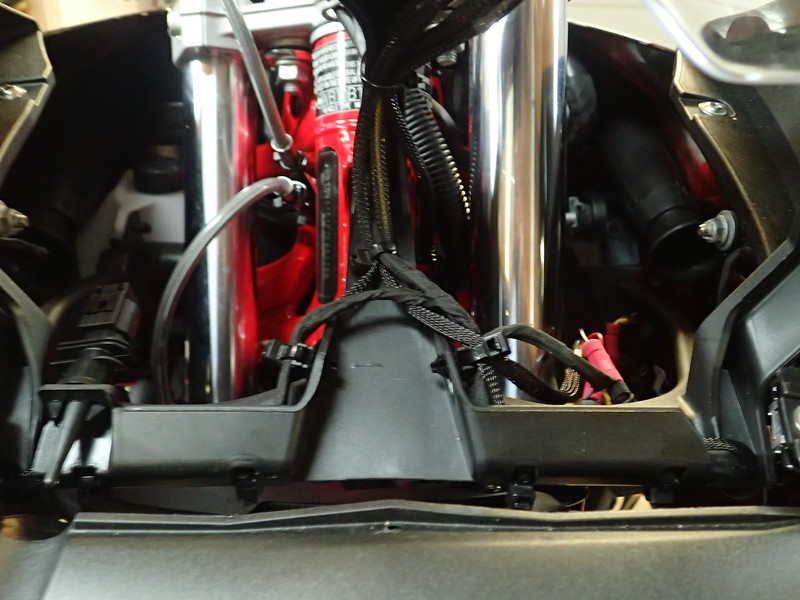
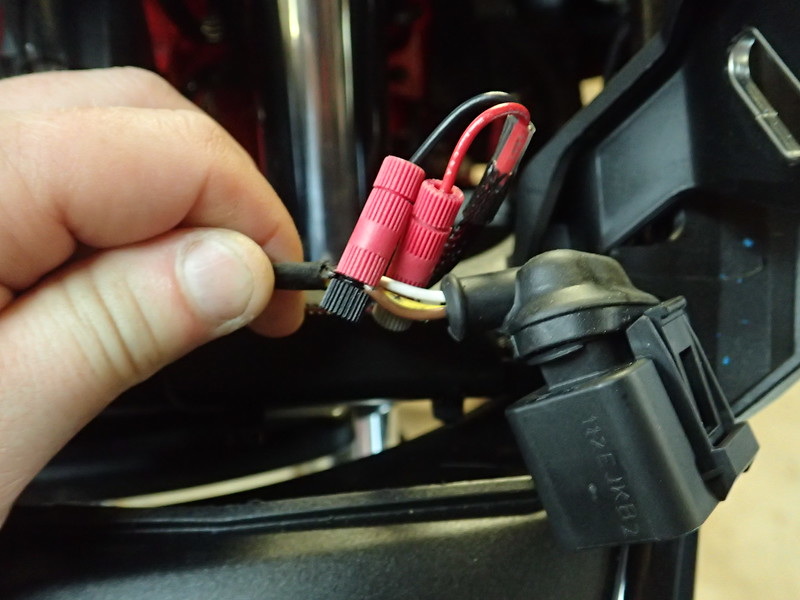
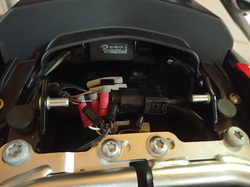
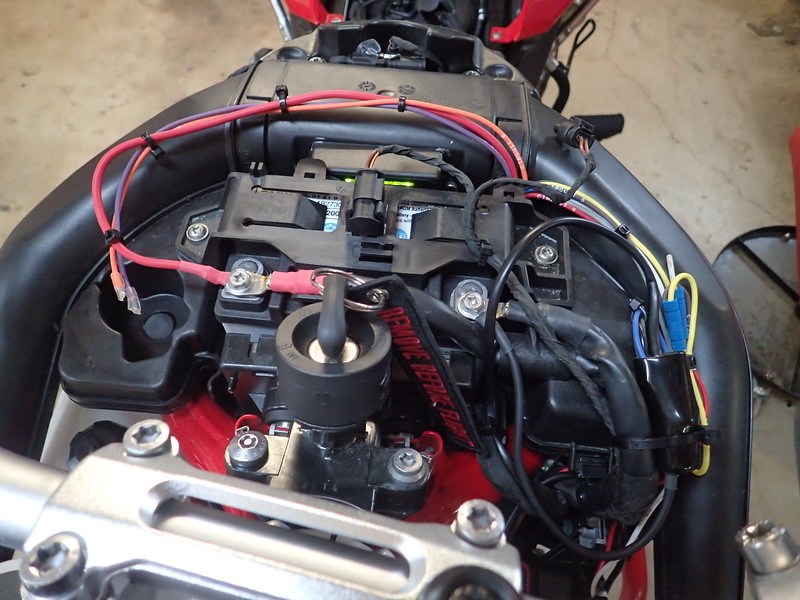
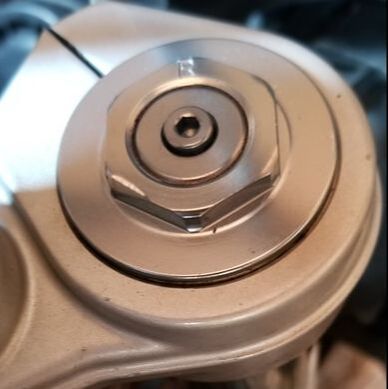
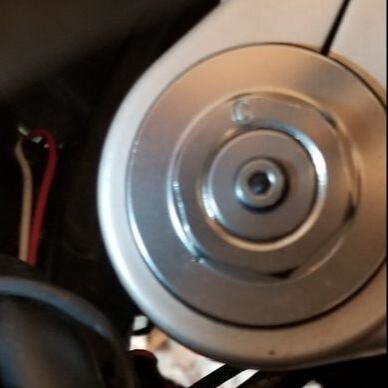
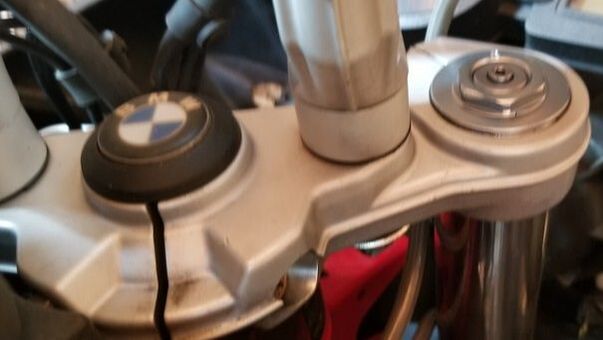
So, put about 1000 miles so far on them.  I was a bit forlorn that the top caps didn't have a bit more "pop", but that is probably pedantic. The handling has been markedly improved.  It wasn't terribly uncommon for that bike to want to drag the front of the crash bar--it no longer does!   Now for some install photos.
Picture
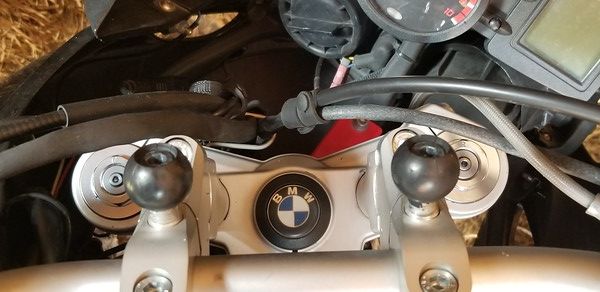
Also, I wasn't expecting compression to be in one fork and rebound in the other.  It's made dialing them in a bit easier, but also not as "sexy" as some other forks we've done. 
Picture
Picture
Picture
Picture
So I nearly gave up on beloved F700 for want good suspension. I guess front suspension is like a modern day nail?

For want of a nail the shoe was lost.
For want of a shoe the horse was lost.
For want of a horse the rider was lost.
For want of a rider the message was lost.
For want of a message the battle was lost.
For want of a battle the kingdom was lost.
And all for the want of a horseshoe nail.

1 Comment

Where oh Where Will You Go (With your Garmin GPS!)

3/26/2016

0 Comments

 
It's really a first world problem.  Much like some females collect high end purses or perhaps high healed shoes that come with a pedigree, I collect bikes.  To make matters perhaps even worse, I love, rather I utterly, completely unequivocally adore navigation by GPS.  While a bit long in the tooth now, my Garmin Zumo 660 has been fabulous, but I hate the Motorcycle Power cradle. 

It's easy to see why I hate this mount.  First off, we are powering a GPS, not running NASA.  This all-in-one mount not only includes the power wires, but also a audio out for your headphone navigation and also another audio port (in?). Perhaps the best feature of this whole contraption is the female micro USB port which is used to allow you send files to the GPS without undocking it.  However, this port is not waterproof and when it gets wet will send all kinds of messages to your GPS which will render it useless as it will cover the entire screen with useless error messages.  For all of this joy, you will be $60 dollars lighter in your pocket. 
Picture
The next sticker shock comes when you realize that mount is really not designed for off-roading motorcycling. In fact, one friend of mine lost not one, but TWO Zumo 660s as they unclipped from the above mount and skipped down the tarmac to thier ultimate demise.   Also, electronics really don't flourish in high vibration environments, so it's also a good idea to find a mount that cannot only provide security but also vibration dampening.  Touratech to the rescue!
Picture
Picture
However, I really don't want to spend $300 on every bike I own just for the privilege of using a GPS.  That is $300 if you installed it how Garmin suggest.  But what if you really only needed to power the GPS and throw caution to the wind on the other functions in the cable?  Well, that it is exactly what I did. I started with buying two of these 2-Pin SAE cable with 7.5AMP inline fuse.  Since I use a PDM60, I will cut off the fuse on which gets power from the bike.  However, do ensure you keep the polarity the same.  The positive lead should be the wire with recessed pin. 
Picture
I also add a 1" RAM Mount ball somewhere on the handle bars.  This is what two prepped bikes look like.
Picture
Picture
With the bike end prepped, it's now time to tinker with GPS end.  I will cut off all the connectors and only leave about 8-10" of power lead wires.  Since they are such a small wire, I will solder them, then cover them with a short and long piece of adhesive Lined heat shrink.  The adhesive lining is excellent for weatherproofing, and the shrink itself will provide strain relief and hopefully prevent mechanical fatigue.  Some of my favorite adhesive heat shrink is from Napa Auto parts #NW 729134. 

Of note here, in order to get the SAE plug to mate to your bike's connection, the positive connector on your GPS MOUNT is now going to the be exposed pin.  There is no harm such as arcing, as it's impossible for this pin to be engerized when unplugged.  
Picture
0 Comments

Old Man Winter--The Quest for Windscreens

1/10/2016

0 Comments

 
Well, I had pretty much figured that the sled was just about all completed.  Then Winter hit.  And hit with a vengeance she did.  After a 1400 mile gallop to Florida and back in 38F weather, it was all but clear to me that I need to get some of the wind blast off me.  Since I am so very short in the torso, it's not going to take very much to solve this issue.  Or so the quest always begins.

After mulling options from Cee Baileys, and a few others I opt for the Sport Vtechnik Vstream Windscreen in smoke color. 
Picture
Picture
Picture
This was definitely a situation where I should have looked before I lept. It was immediately obvious of 2 things as soon as I unboxed it for mock-up.  First off, the bubbly shape of the screen looked like it belonged more on a bike from the 1970s CHIPS bike than on the modern chiseled body of the F700.  While I may have been able to wince my eyes, the larger issue was one not so trivially ignored.  Despite being a direct vendor for BMW, Vtechnik didn't cut the windshield to allow for the BMW hand guards. So, the bike probably lost the last 5 degrees of motion as you rotated the bars to full lock.  Not that I was terribly concerned about the 5 degrees, in so much as, I was sure that I was just bust off the windshield....and knowing me at the most inconvenient time.   Noodling though this mess, I do find one solution.  This guy is apparently a wizard with a jig saw, and makes this amazing notch.  I don't think I have that gift, and it seems wrong to give it a go on $200 windscreen that is still from the 1970s. Back to vendor it goes.

I guess I should have started this story with my first failure of windscreens.  I had originally planned on running the stock F800gs windscreen, with is the correct height for me, doesn't vibrate, doesn't hit the hand guards a full lock and matches the lines of the body panels.  However, to the fit the F700gs, you need to buy additional brackets. No biggie, they were $10 and I was on my way.  Except, after they came in I never test fit them.  As it turns out, there are actually two different brackets, and naturally I need the $60 bracket.  BMW Part number 77 33 8 531 603 SET: SET, WINDSHIELD HOLDERS
Picture
Not content to accept this dorky bracket solution, I retreat to my thinking cave. Original height of the F700GS windscreen measures 7" (180mm) tall when measured in a center line from top center and 10" wide.
It was by sheer brilliance, that I find a chap that build a better mouse trap.  Instead of using the brackets, he simply cut off the F800gs sides. This will get me just enough clearance at 8.6" (220mm).
Picture
The starting point--the stock F700GS windscreen. Where did all those craze marks come from in 7 months of use!
Picture
F800GS Windscreen, notice the angle of the sides
Picture
Cutting off the side support from the F800GS to match the F700GS side support
We actually cut the F800GS windscreen in two steps.  The old adage, I've cut it twice and it's too short!   The first cut was at the bend of the side support into the main screen.  This allowed us to bolt it up.  From there, we were able to match the line angle of the F700GS side. But first, we need to tape it off to work the screen without scratching it all to hell.
Picture
Picture
Now that we've got this project by the tail, time to throw it on the Baldor buffer with the 3M wheel to grind down the sharp cut of the edges.  While we are there, just round the corners a hair.  But why stop there?  It's a black and red bike, time to black out the windscreen.  So, into the blasting machine to lightly peen the inside surface so the paint will have a nice surface to stick to. By appplying the paint to the inside of the screen, it doesn't chip off when it gets hit by road debris.   Three coats later of Krylon Fusion for Plastic Spray paint and she's done. 

Picture
Height Comparison F700GS to F800GS
Picture
No interference issues.
Picture
And Done! As a bonus, all the instrument cluster is now nicely concealed too.
0 Comments

Go Go Gadget!

8/7/2015

0 Comments

 
Picture
In my previous post about the BMW Adventure pannier racks, I mentioned my lust over their incredibly sturdy, indestructible as heck, and amazing grab handles the rack were (and I have tested many).  One of the other advantages of the BMW Adventure pannier racks is that the Camel Tank auxiliary fuel tank is designed specifically to be used with them.  The Camel Tank adds 1.8 gallons to the bikes 4.2 gallon underseat tank (6 gallons total), which is a 42% gain!

In the following photo, you can see the tank has been molded around the support bracket for the adventure rack. The BMW Adventure rack also provide a nice protective "exoskeleton" for the fuel tank. No need to worry about make a tip over, an gas-fueled inferno in the middle the neverland wonderland! 

Picture
While gas range is highly variable on this bike, in normal riding I plan on about 280 miles per fill up.  If one the highway >70MPH, it will drop to around 200 miles per fill up.  

The first generation of F650/F800s twin had a fuel gauge which apparently had a hard time dealing with the unique shape of the underseat tank. It was often inaccurate for the first half of the tank, as the float bobbed in this odd geometric pool.  To "fix" this issue, the F700GS' now have a fuel gauge that only reads below 1/2 tank. The camel tank operates by via vacuum pressure and the fuel needs to transfer to the main tank first.  Thus, your fuel gauge continues to operate as "usual", however, it will stay pinned longer at the top of the gauge for an extra 1.8 gallons. 

​It's clear that the inventors of the camel tank really thought this mod out.  Although I enjoy modding bikes, I can also appreciate that finding a buyer that has the same needs and/or can afford to the higher price point, I usually end up returning the bike to stock before sale.  For this mod, I have only drilled a single hole in the bike.  This is in the following photo, you see the hole on the rear sail panel.  You can either to decide to live with that little hole, or buy a spare panel from BMW for around $50.
Picture
As for the plumbing, the Camel Tank is plumbed into the main bike using vacuum.  There is minor amount plumbing which is needed, however, the kit comes with the one way valve and the "T"  and extra hose to make this happen.  No removal of the fuel pump is needed.  Maybe a picture later. 
0 Comments

Baggage of Illusions

8/6/2015

0 Comments

 
Picture
When it comes to luggage, I've probably crash dummied more sets than most.  I started my mis-adventures with the sleek Vario panniers.  True to BMW design, the Vario rack system is elegant, simply stated, yet incredibly functional and unrust-able. The Varios themselves, however, missed the mark.  While the locking mechanism is ignition keyed, the side-loading nature of the bags is a bit plucky. I probably never opened them without fishing everything I didn't want off the ground to repack them again.  Also, they are expandable which is a slick option.  However, the expansion gear is a bit fragile when the bike gets nappy in the parking lot.  While you can reset the expansion gear, it's terribly time consuming, and shortly there after you break the teeth off needing a $421 replacement pannier.

I found the metal BMW adventure panniers to be be surprisingly fragile, and I don't think I have ever seen one pair that hasn't leaked right out of the box. The gasket system just isn't all that great. And while I love the ignition keyed locks, the latches themselves are bit clunky.  Not that it's important so much for a road bike, but it seems you only get about 2-3 crashes before they are so far out of square you can't re-bend them.  The latches attach the pannier to the frame opposite of the R1200gs.  This also means that the latches are often tweaked when the bike falls, although you can replace them for $60/pop.  The replacement fee for the entire pannier is $571/each.  However, the racks are incredibly stable, indestructible as heck, and amazing grab handles.  I didn't think the finish was all that important until I got another set of racks, that would just rust before my eyes.

Which brings me to the Jesse system.  The panniers are indestructible.  They probably have the biggest volume, for the the narrowest width in the industry.  The panniers are made out of battle-proven aluminum plate, however, at a cost of higher weight.  The down fall to the system is the racks though.  The rack is made out of steel, and rusts, rusts, and more rusts before your eyes.  The rack system also doesn't attache to the rear of the subframe the same way as the BMW racks do, and therefore aren't are stable.  My last gripe about the Jesse racks is that it too a heck of shimming to get them to even mount up to the bike, and even then, they never seemed 'right'.  However, the pizza box top case was personal favorite. While the case consistently rattled through its' 77K mile existence, it was  functionally shaped to handle all that I could throw at it.  At one point, the joke was the top case had more dents that than my skidplate!  The latch drove me nuts too, if it wasn't locked with the key, the latch would rattle open.  How I never lost anything as it flopped open in the open wind is beyond me. 

On my little bikes, I started using both the Giant Loop Great Basin and also the Wolfman Expedition panniers. While the Great Basin is about the only option for a bike without racks, it leaks like a sieve and rubs the heck out of the body panels.  The Great Basins are not quick, semi-quick to access during your trip.  The Expeditions however, are very waterproof attache well and have become a local favorite!

So, where to go with this build? 

Picture
Picture
Picture
I really used unconventional wisdom for this, and took the best of everything.  I needed a top case for lunch box carrying, pannier racks for my occasionally weekend packout using the soft bags.I decided on the BMW Adventure Racks for rustfree grab handle durability,  the Vario top case system with it's shape consistent with the Jesse Pizza box, but the latching system of the Varios, and the Wolfman Expedition panniers for lightness/waterproofness.  The expeditions are used on multiple bikes, and also have this speed loading enhancement.  

0 Comments

Nap time

7/26/2015

0 Comments

 
Picture
Perhaps the best thing about kindergarten was nap time. You know that time after lunch and before afternoon cookies where you could just lay down and give the day a think. You were stuck there whether you liked it or not for the next 60 (never-ending kid) minutes.  It seems that my bikes have also had a predilection to napping also. Some bikes have even have bouts of undiagnosed narcolepsy, but the seemingly in all those events it never stopped our adventures.

So, while Roulette is going to be a 'road' only bike, it's best we consider some minimal armoring.  It's the difference between riding home and not. First up are some hand guards, lest we take a parking lot nap and snap off some levers. The BMW hardware (P/Ns 77328532948 71607715135 71607705964) resists rust pitting and has an incredible finish.  They are refined enough. Remember, the F700s run a 7/8 diameter handle bar vs the larger 1" on the F800s, so you need to order the correct ones!


I didn't want a huge skidplate, just something to keep the errant rocks off the all important, life-giving oil pan sump.  Skidplates seem to come in 2 forms--those that are meant to tractor through Armageddon other are flimsy carbon fiber.  Carbon fiber while light is much like giving a band-aide to a someone that has been shot.  It's really not to solve what ails them.  I settled on the Touratech small skid plate.  It covers the front oil cooler, has side wings, but still tucks up really nicely and unobtrusively.

Picture
Picture
At this point, you'd think we've met the requirement for protection.  But nope, as I put the bike on the lift, I notice an incredible amount of road spray on the radiator.  Bending some fins and only 2000 miles on the odometer.  Alrighty then, off to Wunderlich (P/N 8601521) for a nice radiator guard.


0 Comments

Beware of the Insatiable Need to Color Match

7/23/2015

0 Comments

 
Picture
 It used to be that when we stopped everyone drooled on the knarled out Adventure bike of Bruce's. Today, the tables have turned, as I have captured the attention of every 4 ft tall 5 year old. Bruce thinks they are mistaking my bike for Santa's Sled! 

However, I am not deterred by semantics.   Owning a Racing Red powder coated bike just oooozes with class.  I even went to far as to mount up a nice set of Racing Red crash bars by Krauser.  Why not bling some more, right?  However, since mounting those up I've put a kibosh on more red.  At some point (already?), it's just going to be downright gaudy. 

Picture
Of all the luggage racks that I managed to mash up, the BMW Adventure racks are absolutely rugged.  The way they tie into the subframe makes them rock solid for luggage and a nice grab point.  They are also very well finished so no rusting out like the Jesse racks did.  However, no Racing Red there, just some silver.  However, they also match the silver powder coated hand guards.  The BMW hand guards aren't the Armageddon proof ones, but I wanted something more elegant for commuter. 
Picture
0 Comments

More Cow Bell

7/22/2015

0 Comments

 
After the somewhat laborious negotiation with the insurance company on the bike that was totalled, I decided that this build would take another direction.  Nearly 60 days into this build, I think I am entering the home stretch.  Three parts on back order, the rear shock is being built as we type and one part yet to finalize on spec'ing.  Nonetheless, I think we've achieved the point where form meets function.  This principle states that the shape of a  object should be primarily based upon its intended function or purpose.  And so the ultimate commuter is born.

Some might wonder what the title of the post has to do with a bike build.  Well, from the Saturday Night Live skit, more cowbell has been described on how to make something a bit better.  In this case, a bit more cowbell.
One of the reasons that this build has gone so smooth, is the learning curve of the available marketplace.  Collectively, Bruce and I have spent the last 5 years sampling industry and stressing their products to the max.  Here are the top manufacturers worth taking a look.  These are sorted in the order that I go after specifying parts.  If multiple vendors have the same item, the higher on the list usually wins.

Scheffelmeier Mettall --This man is extraordinary with a welder.  Limited parts offering, but you won't be disappointed with his old world craftmanship!
Wunderlich America --A nice selection of kitting.  Tends to be higher pricing, but we've yet to have an item that does ooze quality. Elegant.
Twisted Throttle-- Another powerhous/parts giant.  Carry many different manufacturers.  Twisted Throttle supports many dual-sporting events as a sponsor, so I do support them when I can.
Wolfman Luggage -- A true waterproof soft luggage
Woodys Wheel Works -- When you really need the strongest rims for your riding
Touratech USA--Another parts giant.  While they stock a wider selection of kit, I find some of their engineering a bit crude. 
SW Motech--Initially, I shied away from them, but found them as one of the few suppliers for my G650XC.  I've been very pleased with their crash bars.
HDB--These hand gaurds can take everything you can throw at them and more.  I've used them on 2 builds, but I thought they were much like killing a fly with a hammer for the F700
Twalcom --Their tool box for the R1200 is the snizzle!
0 Comments

'E' Is for Electron

7/19/2015

0 Comments

 
Picture
It appears that I have been terribly remiss in updating this build!  However in my defense, I've been spending countless hours deciding where to take this build.  My first thought it that this bike is not intended to be my off-roading machine. And while the previous bike had the focus of building to survive an Electro Magnetic Pulse or maybe Armageddon, this one will focus more on road manners. 

Since she will be largely my slabbing machine and daily commuter, I was very concerned with lighting.  To that end, one of the first investments was two products from the Skene Product line--The Photon Blaster and the P3s.   The Photon Blasters are mounted on the front forks.  There a 3 Photon Blaster models (constant on, constant on/blinkers, constant on/blinker/brake flasher.  Unless you are mounting them on the rear of the bike, I wasn't sure how the last model make any sense.  So, I mounted the constant on/blinkers.

A little more than 1 month worth of use/2000 miles and I am very happy with them.  I have found that cars that normally pull right out in front of me from their private drives, are now braking to look. 


It's not a tricky install, but you do need to noodle through a few ideas.  First,  where to mount to control module which is the size of credit card and probably 5-6 cards thick. One thing I hate is a bike that appears it has been eaten by the Lockness Monster and is covered in wiring much like someone might thrown tinsel on a Christmas Tree.  My other pet peeve is traversing the bike 3 times to for a wire run.  With that, I chose under the front windshield.  The casual observer would probably never notice it unless I pointed it out ....
Picture
Picture
When you buy the Photon Blasters, you need to specify the mounting point.  I used the front fender, but you could also use the fork bolts.  Run the Skene wires zip tied to the brake line.

Picture
Picture
Wiring from Skene
Picture
I used the headlight for the power and ground.  While I've had great success with using Posi-Taps, a purist may say that only a crimped/soldered/shrink wrapped connection is adequate. 
Picture
Picture
Picture
Next up was the P3 install.  For this one, easy peasy...just pop that one under the rear of the seat and posi-tap the brake connector

Well, easy that is if you don't drop a bolt and it falls all the way down the tail....Soon enough victory is mine.

Picture
Picture
I also replaced the incandescent turn signal bulbs with these LEDs version. They are plug and play and require not other modifications to not throw any error codes with the CANbus system.  Since they also leave the OEM reflector alone, they are uber bright. I figure I am just about ready to play with the Encounters of the Third Kind!


Next up in the wonderful world of 'E'lectrons is a power distribution module.  While I've used the Eastern Beaver Power, I've found it a bit bulky.  While a bit more spendy, I've found the solid-state technology of the PDM60 to be a better match for my higher end sleds.  I used to try to put them where I could monitor them, but space is such a premium.  Now a days, I tuck it whereever, as you never service it and really never need to look at it again.  In my case, I secured it to the air filter lid by drilling and tapping two holes.  You can still see the lights, but again, those are mearly a function I've never used in 70K miles on the previous bike.
Picture
Picture
Two of the PDM60 circuits are used on power for the GPS unit, a pigtail to the seat for my winter heated gear.  Next up is lighting.  I will say that the F700 has a relatively petite sized stator, as compared to the engine.  As such, I've never been able to run all heated kit (grips, jacket and PIAA Halogen lights) on the previous Twin.  Since it's been 6 years, LEDs lights are really the only logical choice given their dramatic performance improvement, as well as, low current requirements.  My finalist lights were the Clearwater Kristas 2, The Rigid Industries D-Series, Denali D4,  MotoMondos,  and various other ones.  I fell in L.o.V.e with the slick mounting system for the D4s, so I bought those. It was slick, unobstrivsive and plain old clean.  Imagine my shock when I realize that the mounting system won't work on the F700s (F800s) have a side panels.
Picture
Picture
My only recovery will be mounting them to the crash bars.  To be continued when the order comes in
Picture
0 Comments

Homecoming

6/6/2015

0 Comments

 
Newest member of the family!!!


They were a bit surprised to have someone standing on the seat of a brand new bike!
0 Comments
<<Previous
Proudly powered by Weebly